trevor_e36m
Active member
This retrofit is waxed lyrical on the overseas forums, it basically involves swapping out your lower control arms and tension struts for the m3 components. In this DIY, I will only swap out the lower control arms, since I already have Meyle HD tension arms installed. The idea is to Document the process as best I can, and let you know how the car drives post-install.
Let's get into the differences between the various components.
Tension arms (That's the oddly shaped aluminium control arm )
Stock - Fluid-filled bushing
///M3 - Solid Rubber bushing
Meyle HD - Solid Rubber Bushing
Lower Control arms
Stock - Shorter length than m3 for reduced camber, mounts to subframe via bushing
///M3 - Longer component this increases the negative camber, mounts to subframe via a ball joint!
Here is an illustration courtesy of turner motorsport, notice the end that connects to the subframe is actually a ball joint.
.jpg")
The claim here is that you get vastly better steering feel with this mod. I happened to land a set of these for cheap from a junkyard, and they are in stellar condition. More than anything I'm hella curious about the improved handling claims, not that I have any qualms with how the car rides currently.
These are the handling claims
- Better feel through the steering
- Tighter Steering
- Better turn in
- Reduced understeer
Supposedly These changes are because of the negative camber, makes sense that alignment is a must after install.
The m3 arms I bought


A bit of background.
I'm not a mechanic by trade and working on cars is a hobby, I tackle all repair jobs myself, no matter how big. I hate being taken for a ride by service techs. These control arms will be going on my e90 323 with the standard suspension. The Car is bone stock except for the Meyle HD tension arms, stabilizer links and Koni special active shock absorbers that I fitted a few weeks ago.
The tyre setup is 255/40/17 rear and 225/45/17 front, continental contisport contact 2 SSR on style 192m rims
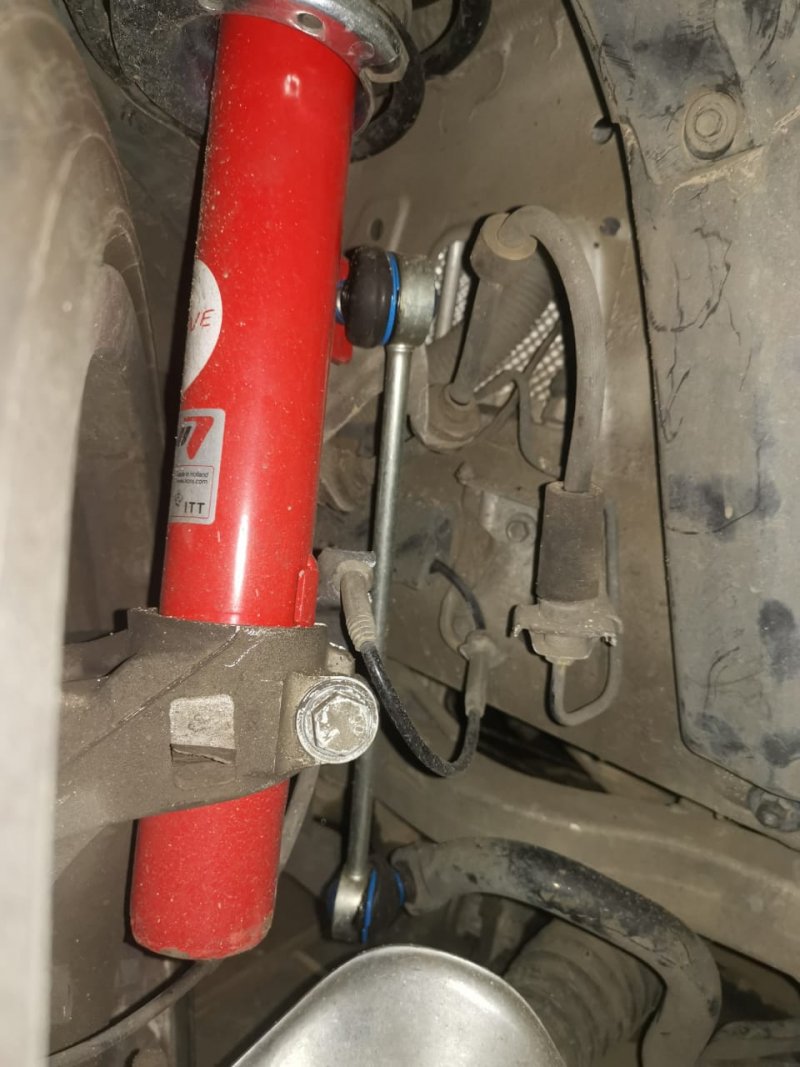
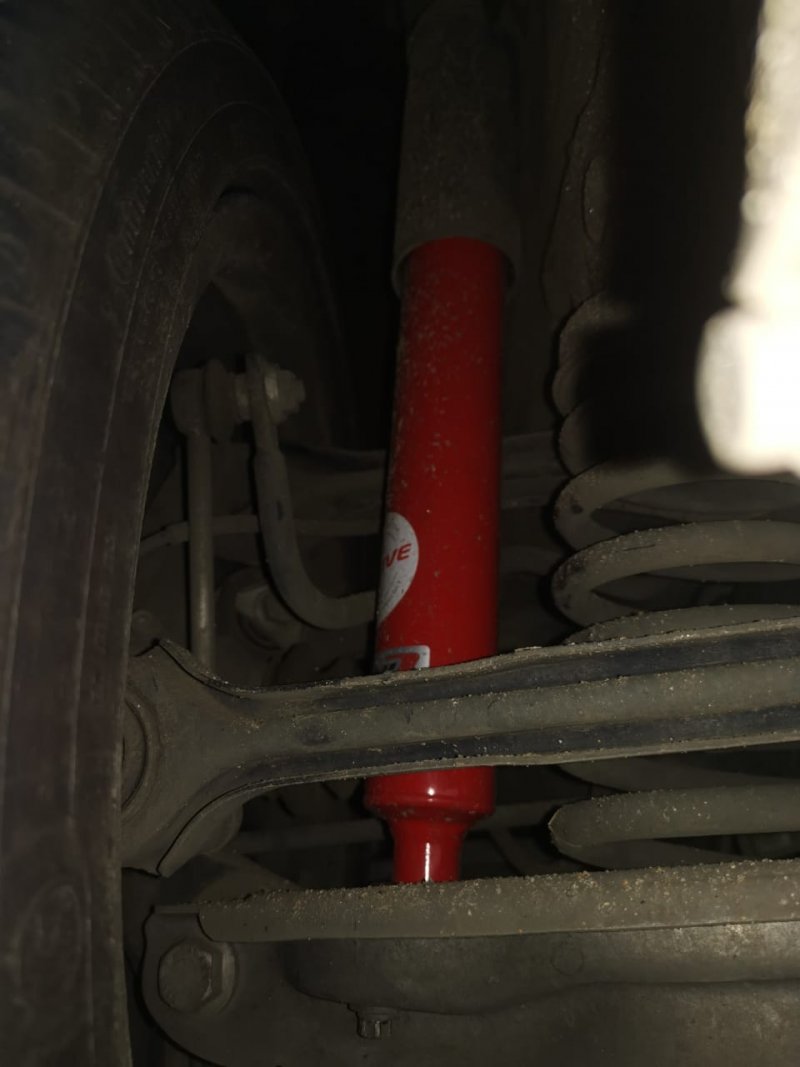
The Ride
.jpg")
Current setup front

setup rear

BTW thus far this setup has been amazing for the price, the special active shocks have a sort of variable damping which is entirely mechanical. For anyone interested I got them here https://www.bimmer-diyshop.co.za/
Main Tools
I learnt the hard way when I was changing the shocks above on my driveway. So this bad boy is indispensable, introducing the IW 2000 impact wrench.

Remember when I say I learnt the hard way lol. This bad boy does wonders on stubborn ball joints. I have him as a backup, hopefully, I don't need to summon him.

The rest of the tools needed are as below
- T40 Torx
- Nr 21 socket
- Nr 18 socket and spanner
- Some choice german words , I discovered that yelling at a ball joint in german is as effective as penetraing spray - Lösen Sie sich jetzt Sie Kugelgelenkmutter
Getting started on the DIY and will post as I go along. The idea is to have the car on the alignment rack tomorrow
Let's get into the differences between the various components.
Tension arms (That's the oddly shaped aluminium control arm )
Stock - Fluid-filled bushing
///M3 - Solid Rubber bushing
Meyle HD - Solid Rubber Bushing
Lower Control arms
Stock - Shorter length than m3 for reduced camber, mounts to subframe via bushing
///M3 - Longer component this increases the negative camber, mounts to subframe via a ball joint!
Here is an illustration courtesy of turner motorsport, notice the end that connects to the subframe is actually a ball joint.
The claim here is that you get vastly better steering feel with this mod. I happened to land a set of these for cheap from a junkyard, and they are in stellar condition. More than anything I'm hella curious about the improved handling claims, not that I have any qualms with how the car rides currently.
These are the handling claims
- Better feel through the steering
- Tighter Steering
- Better turn in
- Reduced understeer
Supposedly These changes are because of the negative camber, makes sense that alignment is a must after install.
The m3 arms I bought
A bit of background.
I'm not a mechanic by trade and working on cars is a hobby, I tackle all repair jobs myself, no matter how big. I hate being taken for a ride by service techs. These control arms will be going on my e90 323 with the standard suspension. The Car is bone stock except for the Meyle HD tension arms, stabilizer links and Koni special active shock absorbers that I fitted a few weeks ago.
The tyre setup is 255/40/17 rear and 225/45/17 front, continental contisport contact 2 SSR on style 192m rims
The Ride
Current setup front
setup rear
BTW thus far this setup has been amazing for the price, the special active shocks have a sort of variable damping which is entirely mechanical. For anyone interested I got them here https://www.bimmer-diyshop.co.za/
Main Tools
I learnt the hard way when I was changing the shocks above on my driveway. So this bad boy is indispensable, introducing the IW 2000 impact wrench.
Remember when I say I learnt the hard way lol. This bad boy does wonders on stubborn ball joints. I have him as a backup, hopefully, I don't need to summon him.
The rest of the tools needed are as below
- T40 Torx
- Nr 21 socket
- Nr 18 socket and spanner
- Some choice german words , I discovered that yelling at a ball joint in german is as effective as penetraing spray - Lösen Sie sich jetzt Sie Kugelgelenkmutter
Getting started on the DIY and will post as I go along. The idea is to have the car on the alignment rack tomorrow
Attachments
-
20210507_142001.jpg7.4 MB · Views: 26
-
 IMG-20210430-WA0017.jpg114.9 KB · Views: 25
 -
 sa rear.jpg64 KB · Views: 24
 -
20210507_151512.jpg5.9 MB · Views: 24
-
20210507_151512.jpg5.9 MB · Views: 22
-
20210507_151537.jpg5.7 MB · Views: 22
-
20210507_142335.jpg6 MB · Views: 22
-
20210507_142319 (1).jpg6.2 MB · Views: 22
Last edited: