llewelynlambert7
New member
Hey Guys,
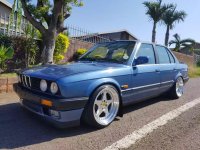
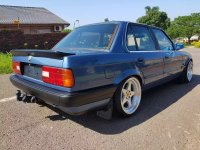
I have been on the forum for a few years now, reading threads and learning from many of the members here. Over the past 3 months I have been busy on a project of my own and decided to do a write up of everything I have done. The project for discussion is my 1988 BMW e30 318i which I’ve converted to 328i with a M52B28 engine from my E36. I will be doing this over a number of post due to the restriction to the number of pictures I can attach.
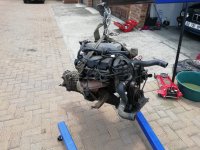
Some background, I removed the multivalve engine from my e36 after dropping a valve. This was the motor I planned to rebuild and install in an e30 body, which I needed to find.
1. Building the Engine
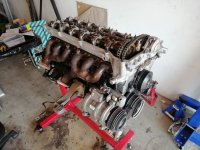
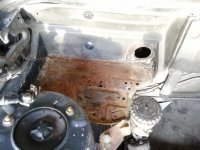
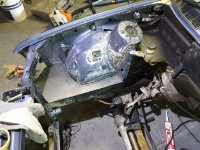
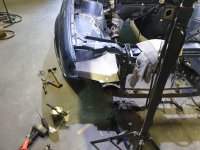
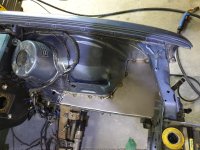
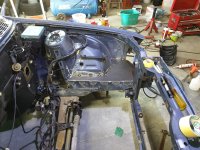
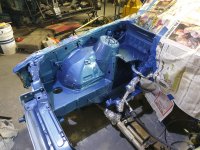
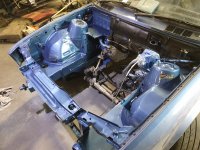
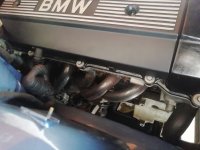
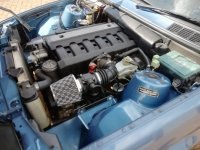
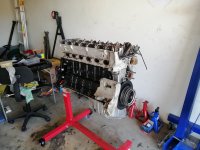
Before disassembly:
View attachment 3
View attachment 4
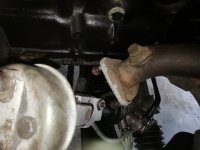
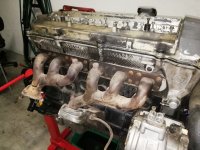
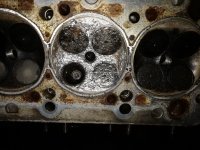
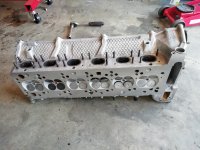
Once the head was removed I found the following damage:
One valve dropped in Cylinder #5:
View attachment 5
Valve damaged cylinder head and tore a hole through the piston, as well as caused slight damage to the cylinder wall.
View attachment 6
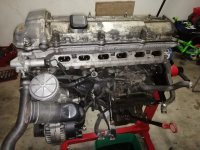
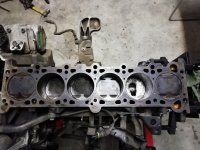
Then sent the head, block and crank to Engineering for checking and repairs, fortunately the head could be repaired.
Received the parts back from Engineering. The block was rebored 20 thou to 84.5mm and cylinders honed.
View attachment 7
While I had the opportunity, I thought I would increase my compression slightly to get a bit more power. Since I had to buy new pistons anyway, I did some research and decided to purchase M50B25tu pistons instead of M52B28 pistons to increase my compression. Standard M52B28 pistons have a Piston compression height of 31.82mm. M50B25tu pistons have a piston compression height of 32.55mm. From the table below the specs of the pistons can be seen, the piston shape can also be seen which shows similar/same location of valve pockets.
View attachment 8
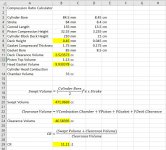
After deciding which piston to use I performed a compression ratio calculation to determine what the approximate compression ratio would be:
View attachment 9
Giving an approximate compression ratio of 11.1. Safe enough for standard 95 fuel.
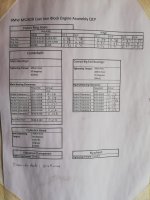
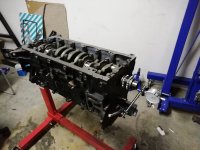
Back to the build, I then installed the main bearings, coating them in assembly lube, fitted crank and checked the bearing clearances using Plastigauge. I also put together a QCP (Quality Control Plan) listing all the tolerances which need to be checked as well as my actuals for the build.
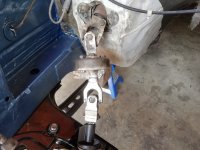
Once the crank bearings were final torqued I checked the axial run out of the crank using a dial gauge as seen below:
View attachment 1
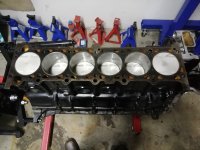
Before fitting the pistons, I checked the piston ring gap on all the rings using a feeler gauge which were in spec. Thereafter I installed the rings on pistons, lubed pistons and cylinders with oil, installed pistons, also checked big end bearing clearances and torqued bolts as per QCP. Installed pistons seen below:
View attachment 2
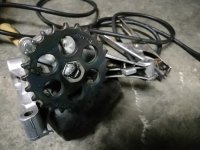
I then tack welded the nut on the oil pump due to the common issue of the nut coming loose over time.
View attachment 3
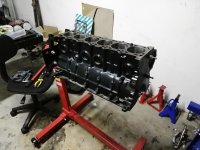
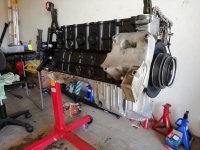
I then installed timing chain, timing cover and m50 525i sump. I replaced all gaskets and seals throughout the build.
View attachment 4
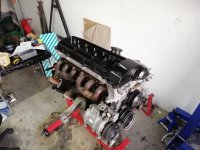
The cylinder head before installation:
View attachment 5
The head installed and torqued using new head bolts.
View attachment 6
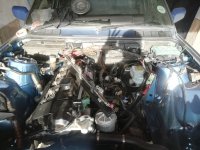
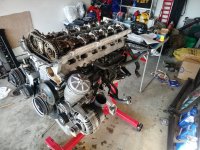
Completed valve train, new valve stem seals were installed at engineering. Also started installing accessories.
View attachment 7
I have been on the forum for a few years now, reading threads and learning from many of the members here. Over the past 3 months I have been busy on a project of my own and decided to do a write up of everything I have done. The project for discussion is my 1988 BMW e30 318i which I’ve converted to 328i with a M52B28 engine from my E36. I will be doing this over a number of post due to the restriction to the number of pictures I can attach.
Some background, I removed the multivalve engine from my e36 after dropping a valve. This was the motor I planned to rebuild and install in an e30 body, which I needed to find.
1. Building the Engine
Before disassembly:
View attachment 3
View attachment 4
Once the head was removed I found the following damage:
One valve dropped in Cylinder #5:
View attachment 5
Valve damaged cylinder head and tore a hole through the piston, as well as caused slight damage to the cylinder wall.
View attachment 6
Then sent the head, block and crank to Engineering for checking and repairs, fortunately the head could be repaired.
Received the parts back from Engineering. The block was rebored 20 thou to 84.5mm and cylinders honed.
View attachment 7
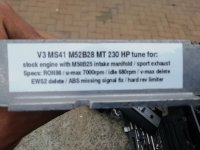
While I had the opportunity, I thought I would increase my compression slightly to get a bit more power. Since I had to buy new pistons anyway, I did some research and decided to purchase M50B25tu pistons instead of M52B28 pistons to increase my compression. Standard M52B28 pistons have a Piston compression height of 31.82mm. M50B25tu pistons have a piston compression height of 32.55mm. From the table below the specs of the pistons can be seen, the piston shape can also be seen which shows similar/same location of valve pockets.
View attachment 8
After deciding which piston to use I performed a compression ratio calculation to determine what the approximate compression ratio would be:
View attachment 9
Giving an approximate compression ratio of 11.1. Safe enough for standard 95 fuel.
Back to the build, I then installed the main bearings, coating them in assembly lube, fitted crank and checked the bearing clearances using Plastigauge. I also put together a QCP (Quality Control Plan) listing all the tolerances which need to be checked as well as my actuals for the build.
Once the crank bearings were final torqued I checked the axial run out of the crank using a dial gauge as seen below:
View attachment 1
Before fitting the pistons, I checked the piston ring gap on all the rings using a feeler gauge which were in spec. Thereafter I installed the rings on pistons, lubed pistons and cylinders with oil, installed pistons, also checked big end bearing clearances and torqued bolts as per QCP. Installed pistons seen below:
View attachment 2
I then tack welded the nut on the oil pump due to the common issue of the nut coming loose over time.
View attachment 3
I then installed timing chain, timing cover and m50 525i sump. I replaced all gaskets and seals throughout the build.
View attachment 4
The cylinder head before installation:
View attachment 5
The head installed and torqued using new head bolts.
View attachment 6
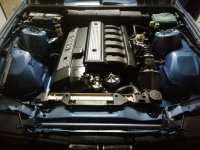
Completed valve train, new valve stem seals were installed at engineering. Also started installing accessories.
View attachment 7
Attachments
-
 IMG_20190729_184357.jpg3.3 MB · Views: 551
 -
 IMG_20190729_184427.jpg2.9 MB · Views: 544
 -
 IMG_20190729_202753.jpg3.9 MB · Views: 546
 -
 IMG_20190729_202814.jpg2.4 MB · Views: 542
 -
 IMG_20190903_191535.jpg3 MB · Views: 540
 -
 Pistons.JPG103.1 KB · Views: 532
 -
 Compression Ratio.jpg111.5 KB · Views: 502
 -
 IMG_20190911_190641.jpg1.7 MB · Views: 481
 -
 IMG_20190909_194952.jpg3.1 MB · Views: 473
 -
 IMG_20190911_200322.jpg3.1 MB · Views: 464
 -
 IMG_20190905_191016.jpg2.8 MB · Views: 458
 -
 IMG_20190914_122901.jpg3 MB · Views: 447
 -
 IMG_20190914_123509.jpg3.5 MB · Views: 453
 -
 IMG_20190914_124433.jpg3 MB · Views: 439
 -
 IMG_20190914_160458.jpg3.7 MB · Views: 446